As the famous saying goes, "Cooking is like love: It should be entered into with abandon or not at all", and who can understand it better than you. With all the love that you put into cooking, maintaining the place where you cook is equally essential, right? It would be best if you had your kitchen as a retreat, where you can indulge your passion and prepare a hearty meal for your family and friends.
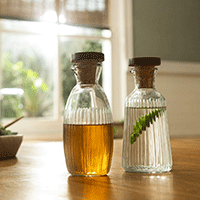
Oil bottles are essential kitchen tools that add both functionality and aesthetic appeal to your culinary space. Whether you use them for storing olive oil, infused oils, or homemade dressings, it's important to keep them clean and well-maintained to ensure the purity and freshness of your ingredients.
For anyone who loves cooking, it is a known fact that maintaining a clean and hygienic environment is an absolute must. Be it keeping the kitchen counters and storage, clean and dust-free, or ensuring the utensils and containers are in the best shape. As much as a kitchen is capable of creating a delicious meal, it is also equally susceptible to mould, fungus and many other disease-causing organisms. Hence, cleanliness is of the utmost importance.
Why Cleanliness Matters
Proper maintenance of your oil bottles is essential for several reasons. Firstly, it helps prevent the buildup of residue and contaminants that can affect the flavour and quality of your oils. Additionally, keeping your bottles clean helps prevent bacterial growth, ensuring the safety of your food and ingredients. Finally, regular cleaning and maintenance help preserve the appearance and longevity of your oil bottles, keeping them looking like new for years to come.
Cleaning Glass Oil Bottles
Glass oil bottles are a popular choice for storing oils due to their durability and transparency. To clean a glass oil bottle, start by emptying any remaining oil and rinsing the bottle with warm water to remove any excess residue. Next, fill the bottle with warm water and a few drops of mild dish soap. Use a bottle brush or sponge to scrub the interior of the bottle, paying special attention to any hard-to-reach areas. Rinse the bottle thoroughly with warm water to remove any soap residue, and allow it to air dry completely before refilling.
In this guide, we'll explore the best practices for cleaning and maintaining your oil bottles, ensuring they remain sparkling clean and ready for use.
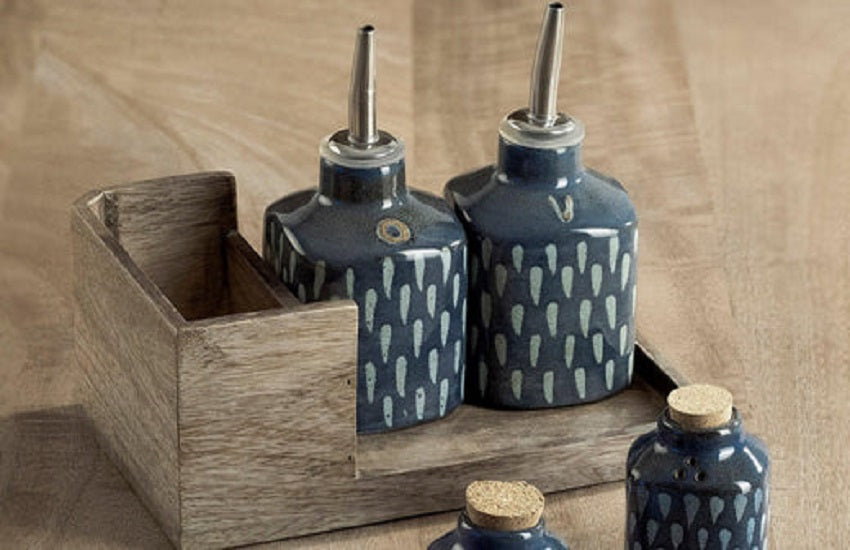
The struggle of cleaning oil bottles
There are many ideas on keeping a kitchen clean, but the one common problem every single cook struggles with is to keep the storage containers clean, especially the oil bottles. Now, cooking oil bottles are special in many ways. They come in a number of different aesthetic styles. Be it distinct designs or lively colours, oil bottles are a showpiece unto themselves, and hence most of us tend to reuse them all the time.
But, over time, the oil tends to stick to the bottle and becomes more and more difficult to get rid of. And if you want to repurpose the bottle, to use it for some other item, cleaning the last bit of oil becomes imperative. This is the time, most people realize, the more intricately designed the bottle, the more difficult it is to clean!
So, what options do we have? Do we let go of the aesthetics and buy oil only in containers that are easy to clean? Or do we throw away such beautiful, sometimes handcrafted bottles, simply because we can’t clean them? Why can’t form and function go hand in hand? Well, they certainly can! Cleaning even the most difficult of oil bottles is not as difficult as you may believe. Let us see how we can achieve this –
Oil, as we know very well, doesn't mix with water. Hence, water alone is not sufficient to get rid of the remaining oil or oil stains.
Nonetheless, the first step in cleaning oil bottles, whatever method you choose, is to empty it and rinse it with water. Once, you have thoroughly rinsed the bottle with water to take out whatever amount of oil you can, here are some different ways you can clean the bottle
Using dish wash liquid and bottle brushes
The first and straightforward method is to fill 3/4th of the bottle with warm water. Then, pour a little dish wash liquid and vinegar at the top of the water. Now, close the lid or cover the neck with your thumb and shake it vigorously. Once the foam is created, clean the bottle with bottle brushes. Throw the solution and rinse thoroughly.
Repeat the above process, till the smell of oil is completely gone from the bottle. Air-dry the bottle and check for any lingering smell. If it continues, increase the quantity of the vinegar and repeat the process.
Using uncooked rice
The next method involves an ingredient that is easily available in your kitchen. Soak the bottle in hot water. Pour a few grains of uncooked rice and a little bit of dish wash liquid. This method is especially helpful if the neck of the bottle is so narrow that the bottle brush cannot be inserted.
With the help of the rice grains, scrub the inside of the bottle thoroughly. Next, rinse it with hot water and air dry it. Repeat the process, until the bottle is clean and all residue of oil is removed.
Using ash
An uncommon but extremely effective method of cleaning an oil bottle is to clean it using ash. Take ash and ensure that it is completely cold, with no residue of fire. Pour it in the bottle with oil remains. Then, place the bottle with the ash in a container that is wide enough to hold and submerge the bottle.
Fill the container with water, till half the bottle is immersed in water. Now boil the water and place it on medium heat, such that the water remains boiling for nearly 20 minutes. Make sure the water does not enter the bottle. Once the bottle is sufficiently heated, turn off the heat and remove the ash from within the bottle. Clean the bottle with warm water and rinse it thoroughly. Air-dry the bottle, and it will be as good as new.
Removing Stubborn Residue
Sometimes, oil residue can become stubborn and difficult to remove, especially if it has been allowed to dry or harden. To tackle stubborn residue, fill the bottle with warm water and add a few drops of white vinegar or baking soda. Allow the solution to sit for several hours or overnight, then use a bottle brush or sponge to scrub the interior of the bottle. Rinse the bottle thoroughly with warm water, and repeat the process if necessary until all residue is removed.
Maintaining Wooden Stoppers
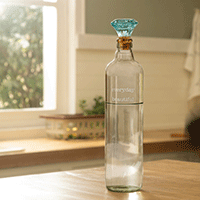
Many Ellementry oil bottles come equipped with wooden stoppers, which add a touch of natural beauty to your kitchen decor. To clean wooden stoppers, remove them from the bottle and rinse them with warm, soapy water. Use a soft brush or cloth to gently scrub away any dirt or residue, taking care not to damage the wood. Rinse the stoppers thoroughly with clean water, and allow them to air dry completely before reattaching to the bottle.
Drying and Storing
After cleaning, it's important to ensure that your oil bottles are completely dry before storing them to prevent the growth of mold or mildew. Allow the bottles to air dry thoroughly, either by placing them upside down on a drying rack or by propping them open with a clean towel. Once dry, store your oil bottles in a cool, dry place away from direct sunlight to maintain their quality and prolong their lifespan.
Conclusion
Proper cleaning and maintenance of your oil bottles are essential for preserving the quality and flavour of your oils, as well as ensuring the safety of your food and ingredients. By following these simple tips and tricks, you can keep your oil bottles sparkling clean and ready for use, adding both functionality and beauty to your kitchen space. At Ellementry, we believe that the care and maintenance of kitchen essentials are key to creating a happy and healthy lifestyle.
Now that you know how to clean and reuse your oil bottles thoroughly, you are ready to indulge yourself in a delicious world. Ellementry gives you a world full of intricately designed bottles, made of different materials and to be used for multiple purposes. Go ahead, display your sense of style and charm your guests with your Ellementry oil bottle collection and the smart use of them. After all, cleaning them is now a breeze.
So, which method are you going to try first? And on which bottles? Do let us know how you found these handy tips and which other persistent problem would you like us to find solutions for.



























































 easy returns
 safe & secure
 hand crafted
